Just thought I would start a little thread about my new 25 Maverick R Max Smar Shocks. So far I have 150 miles on the machine. First things I noticed compared to the 24’s. The two dash compartments come with some spring pieces in them so they have a very solid latch and won’t come open or fly off. The Max also comes with rockblockers from the factory. These are a kind of harder plastic and not sure how long they will last when I get out rock crawling. The transmission in the max is a beast and physically bigger than the two seaters. The low range is way lower and seems to crawl great. I haven’t had it in anything to serious yet though. Also, it seems that the transmission is a little smoother and less clunky. They do still make noise as expected. The gps is lacking, but I have downloaded the UT map and on my ride last weekend it did show every road/trail that my Gaia and BCN showed. This is using the stand alone without having my phone connected. It does track for you with breadcrumbs, but it does not allow you add gpx files or preplan routes etc. I have been super happy so far and I think it will be an absolute beast. It is a little different comparing to my X3 with cvt. It is super nice cruising though as you can shift and control your rpm’s and keep it nice and quiet. It cruises at 65 the way the x3 cruises at 50. You can go down the road being street legal and it’s super comfortable. Hopefully get it down to Moab next weekend and do a Little Rock crawling.

Glover’s Mav R Max Build
21 - 40 of 138 Posts
Joined
·
14 Posts
dope photos! What are you using for the A Pillar light mounts?I also got a deal from Hella Lighting where they sent me some of their new light series and we did a promotional film for them. So I got them all installed. These new lights are pretty sweet. It’s a black magic series 40” lightbar that I would say is comparable to my rigid I have on the x3. The pod lights on the a pillars are 3” and the ones in front of the grille are the 4” with side shooters. These are pretty sweet and all of them have an X in them that you can light separately in either amber or white color. On the side shooters you choose if you want the left or the right side to come on. So I got a bunch of professional photos done and waiting for hella to approve the video. They seem to be very good quality and are pretty bright. I would say the 4” are not quite as bright as my BD LP4’s on the X3. But I also think they are a physically smaller light as well. I also added the WD Electronics street legal kit with replacement signature light blinkers. Kit is super clean and easy to do. I even have the blinkers in the factory dash blinking. View attachment 318904  View attachment 318902 View attachment 318903
2025 CanAm Maverick R Max SS - 2017 CanAm X3 XRS Turbo R
Joined
·
4,419 Posts
I made the light brackets. They are super simple. I have a BM front (and rear) windshield currently without a roof scoop. Still doing testing on this setup without the roof scoops and working on a few ideas. They are a beast of a machine for sure. I just got the tablet holder and some of the canam bags that I will be getting installed.dope photos! What are you using for the A Pillar light mounts?
Joined
·
14 Posts
Curious to know how you're learning this stuff. Are there any videos detailing how to mount and wire up lights/whips/intercom type stuff? I think I'm going to need a power management system/SwitchWorks type of controller and then getting everything playing nice together seems like a lot to get going. Where can a n00b get up to speed?
2025 CanAm Maverick R Max SS - 2017 CanAm X3 XRS Turbo R
Joined
·
4,419 Posts
I don’t know just always work on my own stuff and I guess decently handy. As you can see in the thread I went with a switchworks alpha 12. I really like it. Makes adding things really easy. I have a switchpros in the x3
Joined
·
14 Posts
Nice, I'll have to check that outI don’t know just always work on my own stuff and I guess decently handy. As you can see in the thread I went with a switchworks alpha 12. I really like it. Makes adding things really easy. I have a switchpros in the x3
2025 CanAm Maverick R Max SS - 2017 CanAm X3 XRS Turbo R
Joined
·
4,419 Posts
Started adding a few bags over the weekend. The Canam factory bags seem to be of good quality at initial use. We will see how they hold up. The overhead bag had a nice hard plastic back that straps up so it doesn’t sag. It should work nicely.
2025 CanAm Maverick R Max SS - 2017 CanAm X3 XRS Turbo R
Joined
·
4,419 Posts
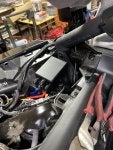
Also the factory winch setup goes in this spot below. I was hoping to use it, but the SuperATV black ops winch that has wireless control comes with a bigger solenoid that won’t fit in the factory made location. So I am going to move it just to the passenger side. Battery cables only have to be about 18” long to reach to the posts that are already run from the battery. The factory harness utilizes the winch for these as well so I figure they must be perfectly sufficient. So this saves running a bunch of wire. I am also going to wire the winch in and out into my switchworks. This takes two buttons, but the only slots open are between the seats and not sure I want my winch switch down there.
Joined
·
4,116 Posts
Lookin good!
2025 CanAm Maverick R Max SS - 2017 CanAm X3 XRS Turbo R
Joined
·
4,419 Posts
Got a little more work done this afternoon. Wired the battery cables to winch solenoid and also ran the in and out button into my switchworks. While I was at it I also added my Gorilla Aloha controller in and got my wires ran up to where I will mount my whips. I have the integration to make my whips also be brake lights and blinkers. And they have a reverse light setting as well. The left and right turn signals are easy as my street legal kit runs right down the center console as well. So I will just tap into those right there. Does anyone know what may be the easiest to find the brake wire in the center console if possible and not have to run clear out to a taillight to pick it up. Also any ideas on a reverse signal?
![Image]()
I also added the tablet holder. I wanted it to be a little water tight so I added some weather stripping before mounting it. I also just used speed nuts for the front two bolts rather than doing a nut and bolt like they send you with. I do need to get a longer bolt for the bolt behind the screen as the one it came with I can’t get to reach through and catch the factory speed nut.
![Image]()
![Image]()
I also added the tablet holder. I wanted it to be a little water tight so I added some weather stripping before mounting it. I also just used speed nuts for the front two bolts rather than doing a nut and bolt like they send you with. I do need to get a longer bolt for the bolt behind the screen as the one it came with I can’t get to reach through and catch the factory speed nut.
Joined
·
4,116 Posts
There should be a wire for the brake switch under the dash I would think. Reverse might be harder, you're not using the ACM right?
2025 CanAm Maverick R Max SS - 2017 CanAm X3 XRS Turbo R
Joined
·
4,419 Posts
I am not using the ACM no.There should be a wire for the brake switch under the dash I would think. Reverse might be harder, you're not using the ACM right?
Joined
·
4,061 Posts
looking good
2025 CanAm Maverick R Max SS - 2017 CanAm X3 XRS Turbo R
Joined
·
4,419 Posts
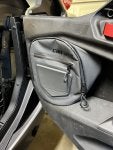
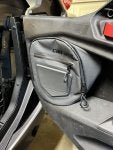
Added the front lower door bags and the rear door bags. They are pretty nice. Hopefully they hold up well. I also got my winch wiring ran. Now just need to mount the winch. Still searching for a revers signal and an easy brake signal wire to hook the whips into. This will give turn signal, brake and reverse in my whips as well. I have the functionality so I figured why not try.
![Image]()
Attachments
-
2.4 MB Views: 20
-
2.4 MB Views: 24
-
2.3 MB Views: 27
Hey! I’m using your post as inspiration while installing the switch works alpha 12 into my Mav R Max. Awesome content, thanks for sharing.I started with a Switchworks Alpha 12 controller. Decided to go this route instead of the switch pro that I had in the x3. So far very similar, but I do like how it comes with the Delphi connector pig tails to easily give you connections to plug/unplug on each circuit. You can also hook up your pieces in any spot and then configure the switch to be in whatever position you want. You can also add multiple pages if you wanted to create lots of buttons to control multiple functions. I have also added rugged radios M1 and remote head STX intercom. The R is much easier to work on for wiring etc than what the x3 is. The hole center console just pops off and gives you access with no tools. The dash also comes apart easily and gives you access from the top. I was able to fish the antenna cable up the a pillar and I have my light bar and wiper cable fished up the other side so that all my wires are inside and not just under my windshield. View attachment 318888 View attachment 318889 View attachment 318891
In one of those pictures, it looks like you removed the back left seat without removing the seat belt. I’m curious how/why you did that, because I am currently struggling to remove the back left seat to access the battery.
I have removed the driver seat as per the manual instructions, and that went well. But the manual instructions include removing the seatbelt anchors too.
My current blocker is the BOTTOM anchor points for the back left seat. I simply cannot reach them 🙃
So how did you remove that seat, and do you have any tips? Thanks!
2025 CanAm Maverick R Max SS - 2017 CanAm X3 XRS Turbo R
Joined
·
4,419 Posts
Just undo the harness lap belts from the shoulder straps then you can leave the shoulder straps in place and then pull the lap belts with the seats. You can lift the seat cushion up and use a socket and extension and go through the seat to undo the rear seat nuts if that’s what you are asking about.
Joined
·
14 Posts
Couple questions: where did you mount the alpha12 brain? Seems like the center console is too small due to the cup holders being so deep. Under the dash seems like a good spot, not sure yet. Do you have to hook up the wires directly to the battery or is it fine to hook up the ACC red wire here up front? thinking about putting it here
If it's like the switch pro, you need both battery and acc power. Acc power is fused and you will likely overload that connection if wired directly.
2025 CanAm Maverick R Max SS - 2017 CanAm X3 XRS Turbo R
Joined
·
4,419 Posts
Get the mount from specific for the Maverick R from switch works. It is what I used super easy and places it in a nice spot to be able to run wires to the connections. You don’t want to go to accessory post but to the hot power and the ground. I assume if you went to those up there it would be fine as the factory runs the winch off the positive and negative. But not the accessory post that is also up there.
Joined
·
14 Posts
Yeah, we’re going to use that ACC post for the accessory and illumination wires. There are two other posts there for positive and ground.Get the mount from specific for the Maverick R from switch works. It is what I used super easy and places it in a nice spot to be able to run wires to the connections. You don’t want to go to accessory post but to the hot power and the ground. I assume if you went to those up there it would be fine as the factory runs the winch off the positive and negative. But not the accessory post that is also up there.
When it comes to mounting, we’re looking for a spot to mount the power distribution unit with all the connections, not the switch.
2025 CanAm Maverick R Max SS - 2017 CanAm X3 XRS Turbo R
Joined
·
4,419 Posts
Yes buy the mounting kit. It places the brains of the operation and the battery cable connection with all the switches right below the driver dash with a really nice easy and secure mount. Switch connections are easy to get to as well. The switch buttons go in the dash in front of the gear shifter really nice as wellYeah, we’re going to use that ACC post for the accessory and illumination wires. There are two other posts there for positive and ground.
When it comes to mounting, we’re looking for a spot to mount the power distribution unit with all the connections, not the switch.
21 - 40 of 138 Posts
-
?
-
?
-
?
-
?
-
?
-
?
-
?
-
?
-
?
-
?
-
?
-
?
-
?
-
?
-
?
-
?
-
?
-
?
-
?
-
?
- posts
- 714K
- members
- 31K
- Since
- 2012
A forum community dedicated to Can-Am Maverick owners and enthusiasts. Come join the discussion about performance, accessories, modifications, troubleshooting, maintenance, and more!
Explore Our Forums
Top Contributors this Month
View All
Hollywood X3
456 Replies
AZ Off Road
301 Replies
HPnMORE4J
138 Replies


